SPIFFS
ESP32

概要

Arduino core for the ESP32を使った、ESP-WROOM-32開発ボードのSPIFFSについての実験です。

SPIFFSと、PCのデータをESP-WROOM-32にアップロードするためのアップローダの使い方を調べました。

Arduino core for the ESP32のインストールのページはこちら

実験

SPIFFS

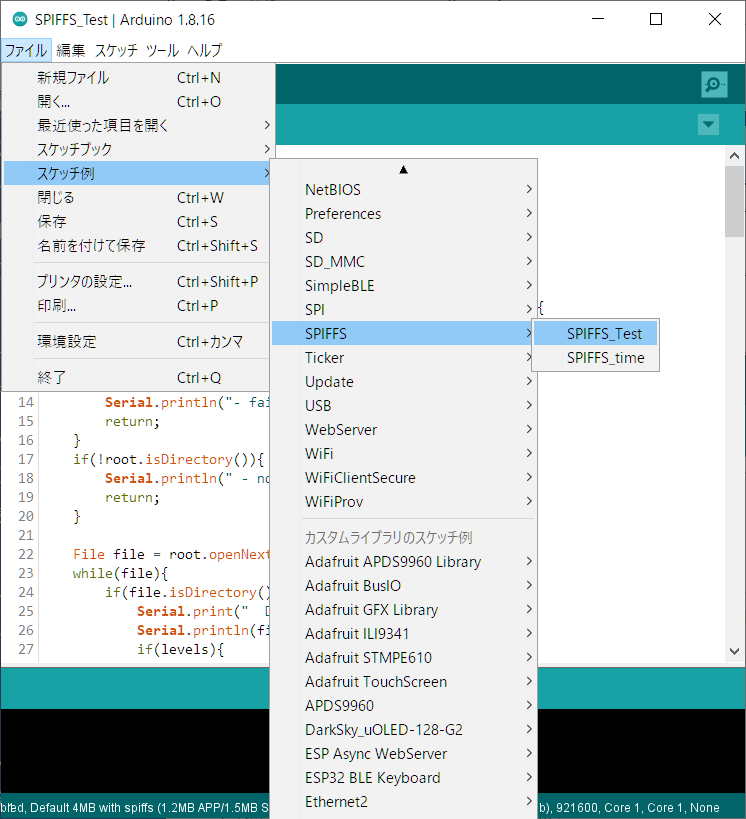
Arduino core for the ESP32に付属のスケッチ例(SPIFFS_Test.ino)をそのまま動かしました。

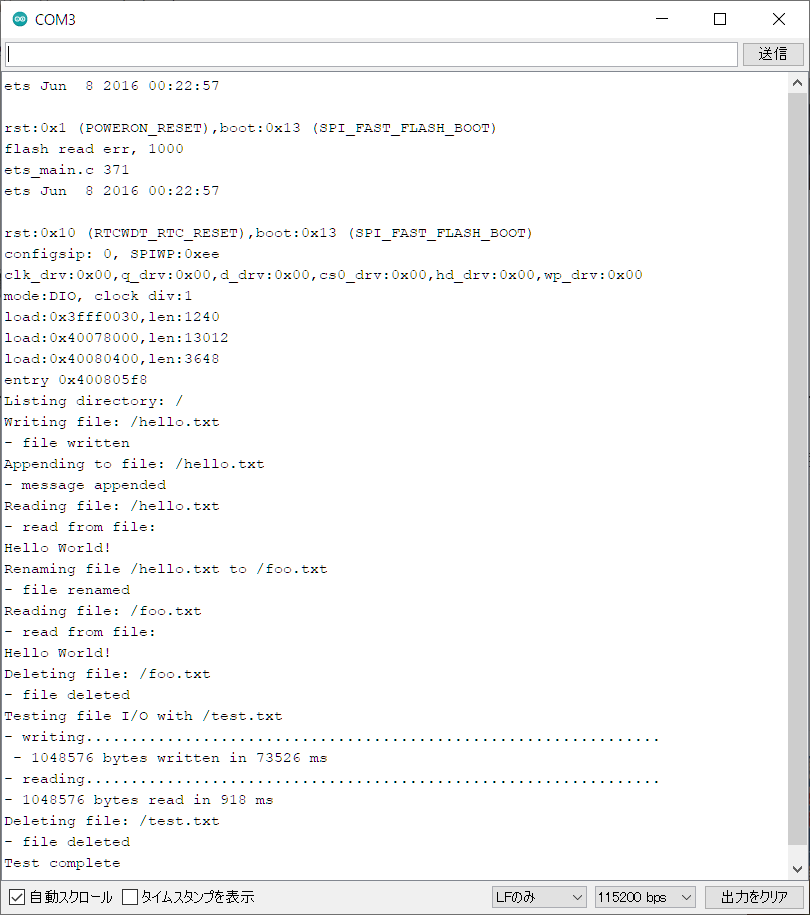
始めてスケッチを動かした際は、SPIFFS.begin()でエラーが発生しました。エラーを保存しなかったので、具体的にどういうエラーが出てきたかは今となっては不明で、その後再現していません。

SPIFFS.begin()を調べてみると、以下のようになっていました。

 1
 2
 3
 4
 5
 6
 7
 8
 9
10
11
12
13
14
15
16
17
18
19
20
21
22
23
24
25
26
27
28
29
30
31
32
33
34
35
36
bool SPIFFSFS::begin(bool formatOnFail, const char * basePath, uint8_t maxOpenFiles, const char * partitionLabel)
{
    if (partitionLabel_){
        free(partitionLabel_);
        partitionLabel_ = NULL;
    }

    if (partitionLabel){
        partitionLabel_ = strdup(partitionLabel);
    }

    if(esp_spiffs_mounted(partitionLabel_)){
        log_w("SPIFFS Already Mounted!");
        return true;
    }

    esp_vfs_spiffs_conf_t conf = {
      .base_path = basePath,
      .partition_label = partitionLabel_,
      .max_files = maxOpenFiles,
      .format_if_mount_failed = false
    };

    esp_err_t err = esp_vfs_spiffs_register(&conf);
    if(err == ESP_FAIL && formatOnFail){
        if(format()){
            err = esp_vfs_spiffs_register(&conf);
        }
    }
    if(err != ESP_OK){
        log_e("Mounting SPIFFS failed! Error: %d", err);
        return false;
    }
    _impl->mountpoint(basePath);
    return true;
}

formatOnFailが味噌のようで、これは、最終的には、esp_err_t esp_vfs_spiffs_register(const esp_vfs_spiffs_conf_t *conf)の引数の、esp_vfs_spiffs_conf_tのformat_if_mount_failedにわたるようで、この引数の意味は、「If true, it will format the file system if it fails to mount.」となっていました。

初回起動したときは、ファイルシステムがフォーマットされておらず、エラーになるのではないかと想像します。試しに、この引数をtrueにして実行してみると、問題なく動作しました。また、一度動作させた後は、この引数を省略(なのでfalse)してもエラーにはなりませんでした。

フォーマットしてしまうので、注意して使う必要があると思います。

実行結果は以下の通りでした。

ファイルアップロード

スケッチからファイル操作を行う以外に、ファイルをPCからESP-WROOM-32にアップロードすることもできるようです。このためには、専用のツールをインストールする必要があります。

https://github.com/me-no-dev/arduino-esp32fs-pluginに説明があるので、その通りに実行しました。

インストール

  • リリースのページから、ツール(2021年11月7日時点では、ESP32FS-1.0.zip)をダウンロードする。

  • ダウンロードしたファイルを、Arduino IDEのtoolsディレクトリに展開する。toolsディレクトリが存在しないときは、作成する。

    • Windows10の場合は、C:\Users\YOURID\Documents\arduino\tools です。YOURIDは自分の環境に合わせてください。

    • toolsディレクトリにzipファイルを配置して、その場で展開すると、ESP32FS\tool\esp32fs.jar というファイルができます。具体的には、次のファイルが出来上がります。C:\Users\YOURID\Documents\arduino\tools\ESP32FS\tool\esp32fs.jar

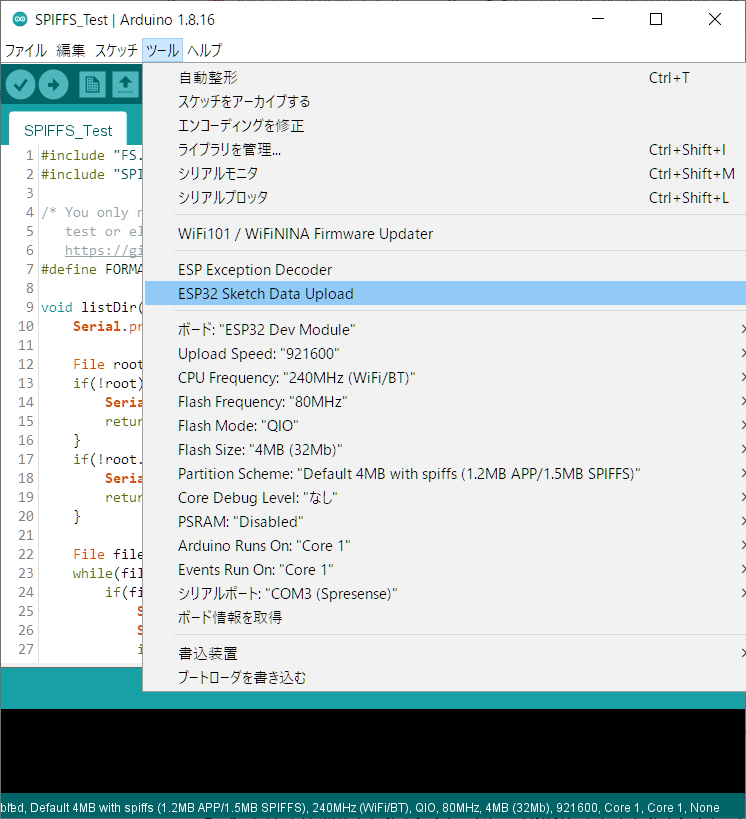
  • Arduino IDEを再起動する。ツールメニューにESP32 Sketch Data Upload というメニューが追加されます。

使い方

使い方は以下の通りです。

  • スケッチのあるディレクトリに、dataというディレクトリを作成する。
  • アップロードしたいファイルを、dataディレクトリに配置する。
  • 正しいボードとポートを選択する。
  • シリアルモニタを閉じる。
  • ツールを起動する。

先述した、SPIFFS_Test.ino にある、listDir()という関数を少し改造したものを呼び出すだけのスケッチを実行すると、実際にアップロードされたことがわかります。

以下で利用している、name()はファイル名を、path()はフルパス名を取得する関数です。

 1
 2
 3
 4
 5
 6
 7
 8
 9
10
11
12
13
14
15
16
17
18
19
20
21
22
23
24
25
26
27
28
29
30
31
32
33
34
35
36
37
38
39
40
41
42
43
44
45
46
47
48
49
50
51
#include "FS.h"
#include "SPIFFS.h"
 
void listDir(fs::FS &fs, const char * dirname, uint8_t levels){
    Serial.printf("Listing directory: %s\r\n", dirname);
 
    File root = fs.open(dirname);
    if(!root){
        Serial.println("- failed to open directory");
        return;
    }
    if(!root.isDirectory()){
        Serial.println(" - not a directory");
        return;
    }
 
    File file = root.openNextFile();
    while(file){
        if(file.isDirectory()){
            Serial.print("  DIR : ");
            Serial.println(file.name());
            if(levels){
                listDir(fs, file.name(), levels -1);
            }
        } else {
            Serial.print("  FILE: ");
            Serial.print(file.name());
            Serial.print("(");
            Serial.print(file.path());
            Serial.print(")");
            Serial.print("\tSIZE: ");
            Serial.println(file.size());
        }
        file = root.openNextFile();
    }
}
 
void setup(){
    Serial.begin(115200);
    if(!SPIFFS.begin()){
        Serial.println("SPIFFS Mount Failed");
        return;
    }
 
    listDir(SPIFFS, "/", 2);
    Serial.println("finished.");
}
 
void loop(){
 
}

dataディレクトリに、以下のファイルを作成して、ファイルをアップロードした後、上記のスケッチを動かした結果を示します。

  • data/file.txt
  • data/dir/file.txt

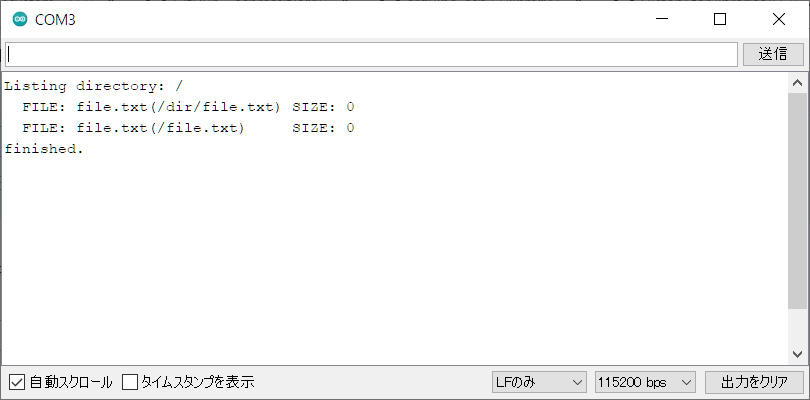
この結果を見ると、本来/dirファイル配下にあるはずの、/dir/file.txtが、ルートディレクトリ配下のファイルとして表示されていることがわかります。

開発元のSPIFFS Filesystemを参照すると、以下の記述がありました。

Currently, SPIFFS does not support directories, it produces a flat structure. If SPIFFS is mounted under /spiffs, then creating a file with the path /spiffs/tmp/myfile.txt will create a file called /tmp/myfile.txt in SPIFFS, instead of myfile.txt in the directory /spiffs/tmp.

‘/‘は、ディレクトリの区切りを示すのではなく、ファイル名の一部として利用されているようです。

バージョン

Hardware:ESP-WROOM-32
Software:Arduino 1.8.16/Arduino core for the ESP32 v2.0.0

最終更新日

March 31, 2022

inserted by FC2 system